Tuesday, November 27, 2012

Beautifully Beaded

Pearl accents are the best way to pull off embellishment without making a piece look gaudy. Pearl beading can be found on items ranging from wedding dresses to casual blouses. But since the application can become meticulous, it can make items pricier than they need to be. Here, I will show just how to create your very own beaded pieces that will save you tons of money. The best part about it is that you don't have to spend hours searching and compromising between price and style. Just create it on your own!
What you will need
1. Needles
2. 100% silk beading thread
3. Three of the smallest bead sizes you can find (I also used a silver cylinder bead to break up the continuity)
4. Scissors
5. Regular thread


    First: Knot the bottom of the beading thread and stack the beads on the line while alternating sizes


*Make sure to leave extra room on the line so that beads can move around.


 Second: Take the string of beads and secure them onto the garment by placing a stitch between each individual bead (over the orginal beading string).
*Wind back and forth so that the beads are very close together and tight.


Finished Product


Monday, August 27, 2012

Fall Accents

Navajo Inspired everything this fall! Pick up an old blazer or Tshirt and pump up it's Native American charm by adding this fall favorite. Just cut and stitch!

Monday, July 16, 2012

It's The Little Things- How Lace Can Transform A Blouse

As I hurdle further into the depths of a repinning frenzy, I begin to come upon the sad realization that I will never have, despite my fervent clicking, all the beautiful and unique clothes that grace the eclectic boards of Pinterest. I stare at a centaur-esque shirt- all cowboy party on top and chiffon business at the bottom. 


It's allure is the Ying Yang effect- the perfect balance of two
contrasting elements. It's as prevalent in Fashion trends as peanut butter and jelly is in a grade school cafeteria.


 As my little tribute to this, I 
created my own version of a balancing act by replacing the back of one of my denim shirts with thrifted lace shirt. Then I stitched a bit of leftover lace onto the front two pockets of the shirt.


Available at the Aster + Brine store at www.esty.com


Now I do understand that this requires time and access to a sewing machine which most of us don't have. Fear not for I have created a DIY to transform a blouse quickly from everyday to chic. 


You Will Need: A needle and thread, a 3"x3" cut of lace, scissors, and
                                                   a blouse


1. Clip a triangular piece off from two separate ends of the lace- any size will do. Make sure that it overlaps around to the back of the collar.

2.  Stitch the lace onto the blouse by threading through the middle of the collar instead of all the way through to the front. This will keep the thread hidden.


3. Knot the tie by stitching again and again in one spot and then looping it several times over. Now you have the finished piece!


Tip: Also looks great with gold fabric or studding to create a fully western look.


Friday, July 13, 2012

Rip 'Em Up- High waisted cut off shorts

As a girl who has gone through a pretty serious "emo" phase in her pre-teens, I feel confident in saying that I have a little rebel in me. What Fashionista doesn't? Being prim and proper all the time is just no fun. From the acid washed tappered jeans that permeated the 80s rock scene to Britney Spears' lower than low hip huggers, ripped denim is something that will never go out of style. It represents the ironic Oh-I-so-do-not-care-but-I-still-want-everyone-to-look-at-me feeling that we all embody from time to time. 

 In the spirit of ubiquitous summer music festivals I figured, "Why not to an easy DIY for cut off shorts?" My inspiration comes from the king and queen of destroyed ensembles, our favorite disheveled couple, Kurt Cobain and Courtney Love.

 
 Known for their---er... alternative habits, these two lovebirds became a symbol for fashion. In rebellion to the yuppie-mall scene created by the Reagan economic boom of the 80s, Kurt and Court helped create a catalyst for social change through their music, clothing, and attitude.


So, my inspiration begins with all things grunge. I'm referring to of course destroyed, high-waisted, and 100% cut off denim. Don't use anything with stretch unless you want to work for hours. 


You Will Need: Scissors, sandpaper and denim pants.I have already cut off my chosen Goodwill mom jeans and frayed them in the washer here. 

Pro-tip: cut off the shorts about 2 inches longer in the back than in the front. High-waisted shorts love to ride up and this prevents unwanted cheek reveal. 


1. Take the scissors and run them back and forth and side to side in a 2" x 2" area on the front of the denim. This will loosen and make little cuts in the fabric so the sanding will be easier. 


2. Next, use the sandpaper rubbing quickly back and forth to remove the layer of top denim. Tip: fold the sandpaper over into a square so it is more handheld. 


The finished product here takes about an hour to do but looks great!


Saturday, June 30, 2012

Bedazzle Me

As I scroll through the columns of merchandise on various websites, I can't help myself but sigh at each sequined and studded collar that permeates each piece. I want them all! But with my college budget, splurging $75 on a top (that is so recognizable, I'll probably only wear twice) just isn't in the cards.

I turn on the TV to VH1's popular series I Love The 70's to procrastinate further from starting that 10 page paper due in a few days. There, featured in black and white ads from '74, is the trademarked Bedazzler. Despite the sarcastic commentary from B level celebrities knocking it's worth, I immediately search for it online. "Maybe it'll be cheap on eBay," I say to myself (clearly I think it is the best invention since sliced bread). To my amazement, the Bedazzler is still sold to this day at craft stores like Michael's and Joann Fabrics for only $20. Finally, a way to DIY embellished blouses and denim.

Now, it is very easy to make something go from chic to tacky with embellishments. Unless you are looking for the guido-fab look, I suggest searching for design inspiration from magazine layouts and trendy online boutiques like Nastygal.com or ASOS.com. My copy? A studded collar on a pink chiffon tank.

I began by studding the outline of the collar.


Then I filled in the lines that I had established with the outline.

One problem with this is that it is not the strongest device and sometimes the studs stick to the inside of the setter. I got into the habit of just taking the sharp end of scissors and holding the stud in place as I pull the top off.
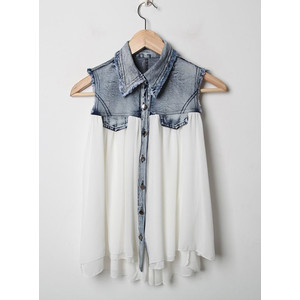
The finished piece!
The best thing about this is that you don't need to be an artist to do it. I'm talking to all those people who to this day can't color inside the lines. This requires very little skill and time and looks great at the end!

Friday, June 8, 2012

Moi!

I was 3yrs old and determined. There, sitting at the top of my sister's monstrous dresser was her shiny black tube of ruby red lipstick. I hovered between the bureau and the entrance into the room for what seemed like hours, weighing the pros and cons. To my toddler's mind, scaling the towering bureau just to get my hands on the tiny gem seemed worth the risk. Even as a child, I had a gargantuan fear of heights. So, I approached the dresser and clenched my tiny fists around the knobs. While maneuvering my toes around the second drawer, the half empty bureau shuddered under my weight but then miraculously retained its upright position. I exhaled a sigh of relief and continued on my trek. Once I was close enough to the top, I threw my hand over the top of the bureau and searched blindly for my prize. I felt it! I grasped the tube quickly and lowered it into my line of sight. Finally, I could have the beautiful red pout that every woman in my life flaunted in front of me every day. I relished in the moment, imagining how wonderful I would look. Alas, karma reared its dark head for my theft and sent the entire bureau toppling over me, breaking my wrist in the process. Luckily my mother immediately heard my cries and came running. And despite the unfortunate circumstances, I still held firm to that little tube of lipstick.

This story is an illustration of my own personal motto to live within my passions regardless of the obstacles that face me. Let's face it, beauty and fashion is EXPENSIVE. And if you aren't the 1% of Americans that can afford to buy designer labels, living the "fab" life is near impossible. I am here to tell you that it isn't. I have been a firm believer in DIY for my entire life. My tools? A sewing machine, makeup brushes and magazines galore! With a little bit of instruction and creativity, anyone can be me.